With just a few simple ingredients, you can create your own sourdough starter, the heart of any good sourdough bread. This recipe is perfect for beginners and seasoned bakers alike, allowing you to craft delicious bread with that unique tangy flavor. The best part? You can use this versatile starter for a variety of baked goods, making it an essential in your kitchen.
Why You’ll Love This Recipe
- Easy to Make: With just flour and water, creating a sourdough starter requires minimal effort.
- Flavorful Bread: A homemade sourdough starter imparts a rich, complex flavor to your bread.
- Cost-Effective: Instead of buying store-bought starters, you can make your own at home.
- Versatile Use: Perfect for bread, pancakes, waffles, and more!
- Sustainable Baking: Making your own starter reduces waste and promotes natural fermentation.
Tools and Preparation
Before diving into making your sourdough starter, it’s essential to have the right tools at your disposal. These tools help ensure that your starter develops properly and remains healthy.
Essential Tools and Equipment
- glass jar or bowl (about 32 ounces)
- paper towel
- rubber band
Importance of Each Tool
- Glass jar or bowl: A clear container allows you to monitor the growth of your sourdough starter easily.
- Paper towel: It covers the jar while allowing airflow, which is crucial for fermentation.
- Rubber band: This helps keep the paper towel in place while marking the initial height of your starter.
Ingredients
With just water and flour, you can make your own sourdough starter for all your homemade bread recipes!
For Your Sourdough Starter
- ½ cup flour (whole wheat or unbleached all-purpose)
- ¼-⅓ cup water (75°F is ideal)
- 1 glass jar or bowl (about 32 ounces)
- 1 paper towel
- 1 rubber band
How to Make Sourdough Starter
Step 1: Combine Ingredients
Start by adding the flour and water into the glass jar or bowl. Mix them until you achieve a thick paste-like consistency.
Step 2: Store the Mixture
Cover the jar with a paper towel secured by a rubber band. This allows air to flow in while keeping dust out.
Step 3: Let it Ferment
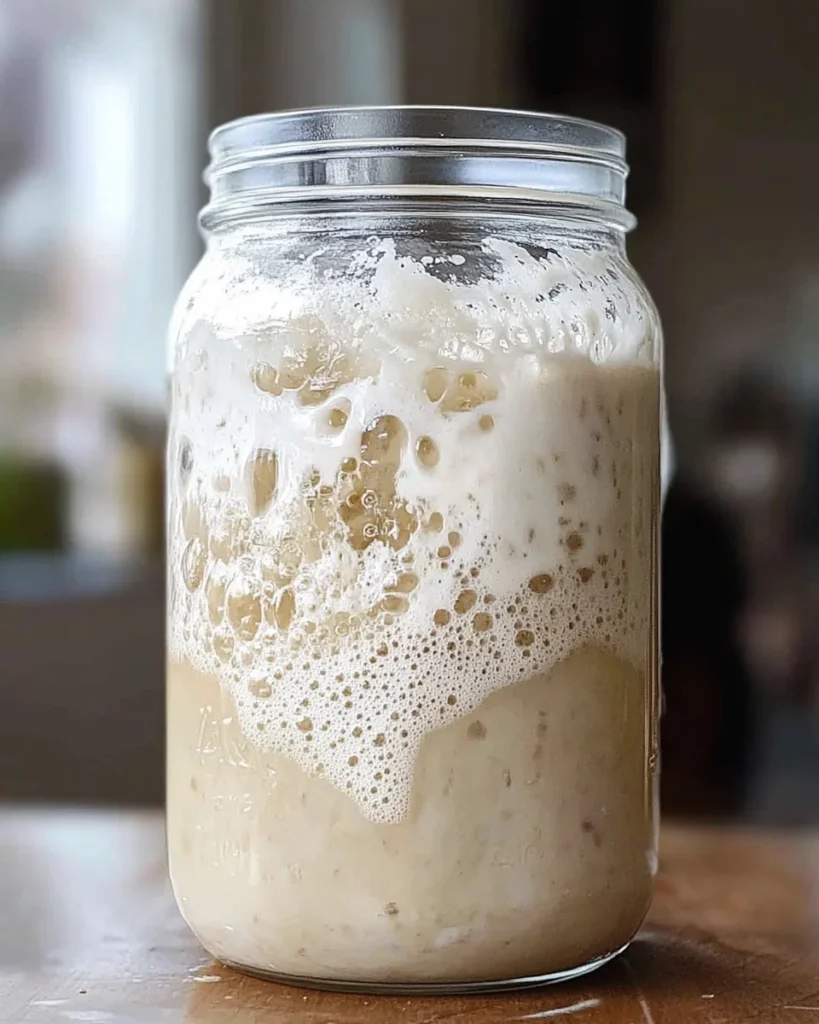
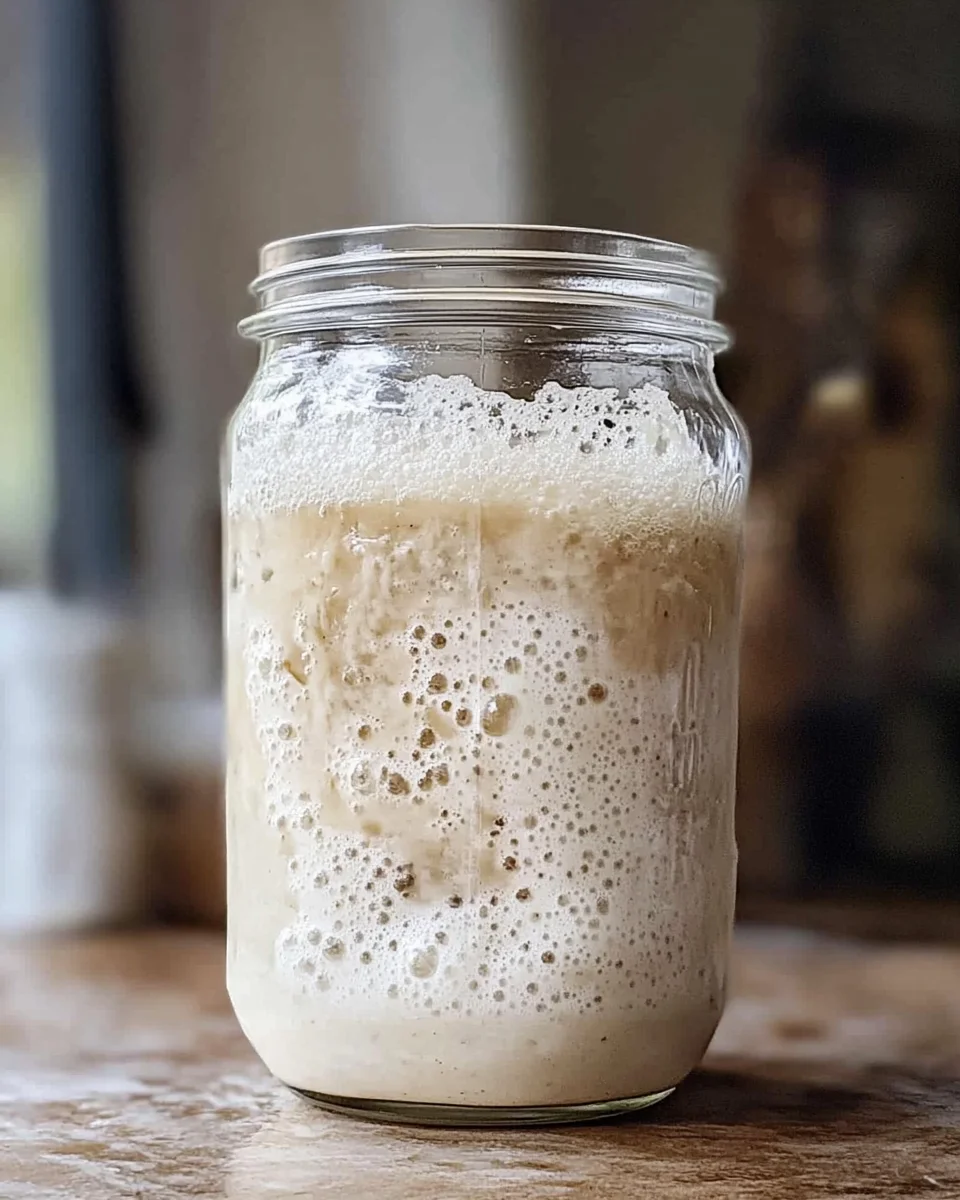
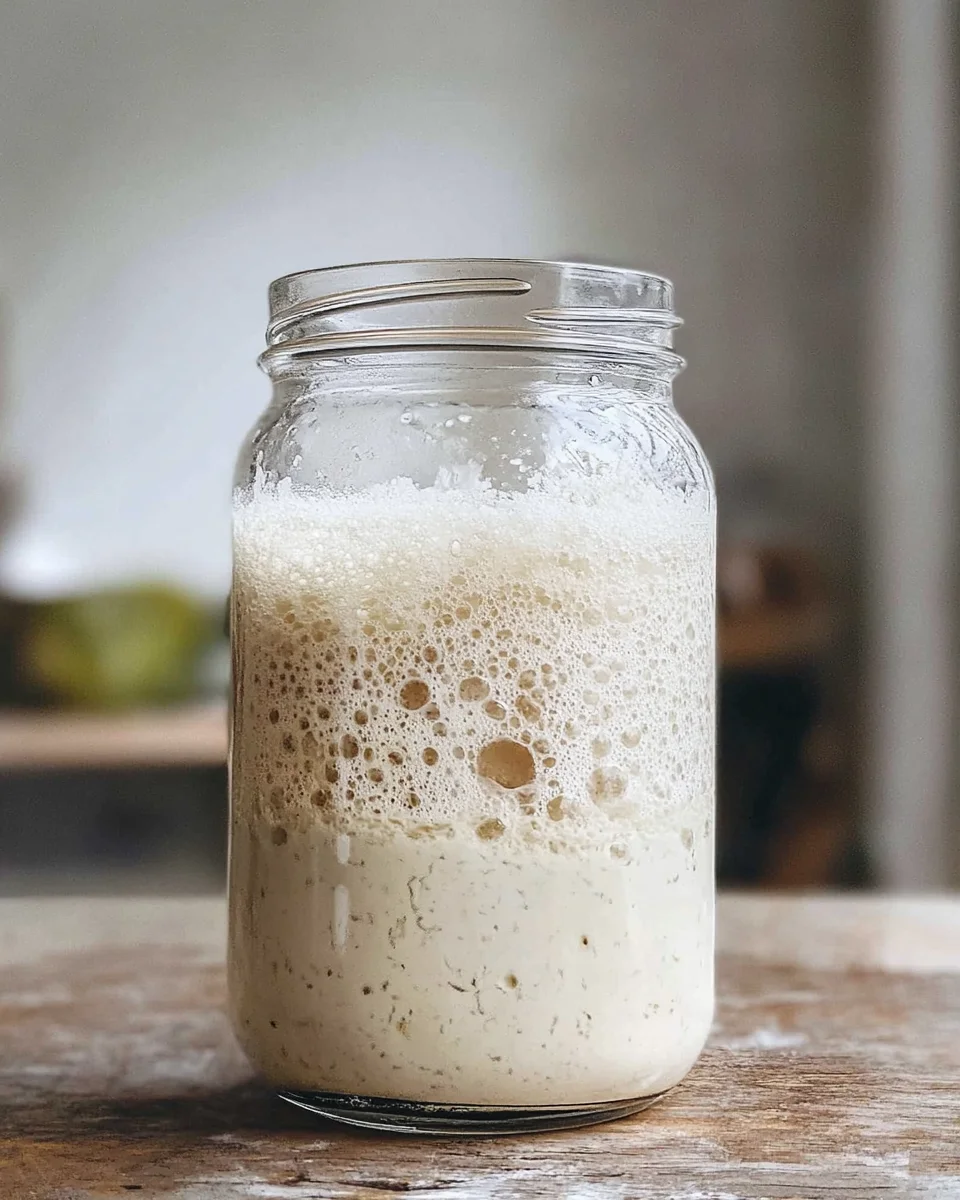
Place the jar in a warm spot (around 75°F) for about 24 hours. Check for bubbles as signs of activity; this indicates that fermentation is starting.
Step 4: Feed Your Starter
After 24 hours, discard half of the mixture. Add another ½ cup of flour and ¼ cup of water. Stir well and cover again. Repeat this feeding process every day for about a week until it’s bubbly and has doubled in size.
By following these steps, you’ll soon have a vibrant sourdough starter ready for all your baking adventures!
How to Serve Sourdough Starter
Sourdough starter is a versatile base for many delicious dishes. It can enhance the flavor and texture of your homemade bread, but it can also be used in various other meals.
Use in Bread Recipes
- You can incorporate sourdough starter into any bread recipe. It adds depth and a tangy flavor that enhances the overall taste.
Make Pancakes or Waffles
- Mix sourdough starter into your pancake or waffle batter for a fluffy texture and unique taste. This is an excellent way to use leftover starter.
Flavorful Muffins
- Add sourdough starter to muffin recipes for extra moisture and a subtle tang. It pairs well with fruits like bananas or blueberries.
Tangy Pizza Crust
- Use sourdough starter to create a pizza crust that has a chewy texture and rich flavor. It’s perfect for homemade pizzas with fresh toppings.
Savory Fritters
- Combine sourdough starter with vegetables to make savory fritters. These are great as appetizers or snacks and are easy to customize.
How to Perfect Sourdough Starter
Getting your sourdough starter just right takes time and care. Here are some tips to help you achieve the perfect balance.
- Feed Regularly: Ensure you feed your starter every 12-24 hours. This keeps it active and bubbly.
- Use the Right Flour: Whole wheat flour adds more nutrients compared to all-purpose flour, helping your starter thrive.
- Maintain Ideal Temperature: Keep your starter at around 75°F for optimal fermentation. Too hot or too cold can slow down its activity.
- Watch for Bubbles: Look for bubbles in your starter; this indicates that it’s alive and fermenting properly.
- Discard Wisely: When feeding, discard half of the starter to keep the mixture manageable and prevent overflow.
Best Side Dishes for Sourdough Starter
Sourdough starter can complement various side dishes beautifully. Here are some tasty options to consider:
- Garlic Bread: A classic side dish, garlic bread made from sourdough adds a crunchy texture and rich flavor to any meal.
- Bruschetta: Top toasted sourdough slices with tomatoes, basil, and olive oil for a fresh appetizer or side.
- Stuffing: Use cubes of sourdough in stuffing recipes for Thanksgiving or festive meals; it absorbs flavors wonderfully.
- Croutons: Make croutons from stale sourdough by baking them until crispy; they add crunch to salads or soups.
- Savory Soups: Pair sourdough with hearty soups, such as tomato basil or minestrone, for a comforting meal.
- Cheese Platter: Serve slices of sourdough with assorted cheeses; its tanginess complements many cheese varieties well.
- Dips: Use toasted sourdough as a vehicle for dips like hummus or spinach-artichoke; it’s perfect for gatherings.
- Salads: Incorporate torn pieces of sourdough into salads for added texture and flavor contrast.
Common Mistakes to Avoid
Making your own sourdough starter can be a rewarding experience, but it’s easy to make mistakes. Here are some common pitfalls to avoid.
- Using the wrong flour: Not all flours are created equal. Whole wheat or unbleached all-purpose flours are best for feeding your sourdough starter. Avoid bleached flours as they may hinder fermentation.
- Incorrect water temperature: If the water is too hot or too cold, it can kill the yeast or slow down its activity. Aim for water around 75°F for best results.
- Covering the jar tightly: A sealed jar will trap gases and moisture, which can spoil your starter. Use a paper towel and rubber band to cover the jar lightly, allowing airflow while keeping debris out.
- Not feeding regularly: Consistent feeding is vital for a healthy sourdough starter. If you neglect feeding it, the yeast may die off, leading to a weak starter that won’t rise.
- Ignoring bubbles and aroma: The presence of bubbles and a pleasant, tangy smell indicate that your starter is active. If you don’t see these signs, it might need more time or a different feeding routine.
Storage & Reheating Instructions
Refrigerator Storage
- Store your sourdough starter in the refrigerator if you don’t plan to use it daily.
- Use an airtight container or a jar with a loose lid to keep it fresh.
- It can last up to 2 weeks without feeding in the fridge.
Freezing Sourdough Starter
- You can freeze your sourdough starter if you need longer storage.
- Portion it into small amounts in freezer-safe containers or bags.
- Use within 3 months for best quality.
Reheating Sourdough Starter
- Oven: Preheat to 200°F and place the starter in for about 10 minutes; this gently warms it up.
- Microwave: Heat on low power in short intervals (5-10 seconds), checking frequently; avoid overheating.
- Stovetop: Place in a bowl over simmering water for gentle warmth until it reaches room temperature.
Frequently Asked Questions
Here are some common questions about maintaining and using your sourdough starter.
How do I know my sourdough starter is ready?
A ready sourdough starter will have doubled in size after feeding and show plenty of bubbles. It should also have a pleasant tangy smell.
Can I use tap water for my sourdough starter?
Yes, but let tap water sit out overnight to allow chlorine to dissipate, which can affect yeast growth.
How often should I feed my sourdough starter?
Feed your sourdough starter every 12-24 hours if kept at room temperature. If refrigerated, once every 1-2 weeks works well.
What can I do if my sourdough starter smells bad?
If it has a strong off-putting smell or shows mold, it’s best to discard it. A healthy starter should smell slightly tangy or yeasty.
Final Thoughts
Creating your own sourdough starter is not just simple but also incredibly rewarding. This recipe allows you to enjoy homemade bread that carries unique flavors and textures. Feel free to customize your sourdough by experimenting with different types of flour or hydration levels!
Bread Recipes
Sourdough Starter
Creating your own sourdough starter is an exciting and rewarding journey into the world of baking. With just flour and water, you can cultivate a lively culture that will enhance the flavor and texture of your homemade bread. This easy recipe is perfect for both beginners and seasoned bakers, allowing you to create delicious loaves with that signature tangy taste. Beyond bread, your sourdough starter can be used in a variety of baked goods, including pancakes, waffles, and muffins. It’s not only cost-effective but also promotes sustainable baking by reducing waste through natural fermentation. Dive into this simple yet fulfilling process today!
- Prep Time: 15 minutes
- Cook Time: N/A
- Total Time: 0 hours
- Yield: Approximately one active sourdough starter (enough for multiple recipes)
- Category: Baking
- Method: Fermentation
- Cuisine: American
Ingredients
- ½ cup whole wheat or unbleached all-purpose flour
- ¼-⅓ cup water (at 75°F)
- 1 glass jar or bowl (about 32 ounces)
- 1 paper towel
- 1 rubber band
Instructions
- Combine the flour and water in a glass jar or bowl until it forms a thick paste.
- Cover the container with a paper towel secured by a rubber band to allow airflow.
- Place the jar in a warm area (around 75°F) for about 24 hours; look for bubbles indicating fermentation.
- After 24 hours, discard half of the mixture, then add another ½ cup of flour and ¼ cup of water. Stir well and cover again.
- Repeat this feeding process daily for about a week until it’s bubbly and has doubled in size.
Nutrition
- Serving Size: ½ cup (120g)
- Calories: 200
- Sugar: 0g
- Sodium: 0mg
- Fat: 0g
- Saturated Fat: 0g
- Unsaturated Fat: 0g
- Trans Fat: 0g
- Carbohydrates: 45g
- Fiber: 2g
- Protein: 6g
- Cholesterol: 0mg